我們可以在 Xcode 透過假的 apns 資料,來測試 Apple Watch 的推播通知。
向使用者取得推播通知的權限
要在 Apple Watch 上測試推播通知之前,必須先取得推播通知的權限,才能繼續下去。最簡單的方式,就是在 App 一打開時,出現的第一個畫面就尋求使用者的同意。
import SwiftUI
import UserNotifications

@main
struct Example: App {
    var body: some Scene {
        WindowGroup {
            ContentView()
                .onAppear {
                    UNUserNotificationCenter.current().requestAuthorization(options: [.alert, .sound, .badge]) { granted, error in
                        print("Permission granted: \(granted)")
                    }
                }
        }
    }
}
因為跟使用者要推播通知的權限會使用到 UNUserNotificationCenter,所以也必須記得 import UserNotifications。
注意
記得要先將此正常的 watchOS App 裝到實機或模擬機上,並打開來按下「允許」,不然後面就算 code 都寫對,再怎麼試推播也不會出來。
有了向使用者發送推播通知的權限後,要在 Apple Watch 上開發推播並做測試時,會建議新增一個專門用來測試推播的 Scheme,因為 Scheme 的設置不同,直接切換會比編輯 Scheme 來的方便。
Apple 用於推播通知的 apns 檔案
apns 檔案概覽
Apple 的推播通知是一個 .apns 的檔案,而其內容其實就只是 JSON 資料而已,裡面包含了一些由 Apple 定義好的 key,也可以根據自身需求新增客製的 key。
新增一個模擬推播通知的 apns 檔案
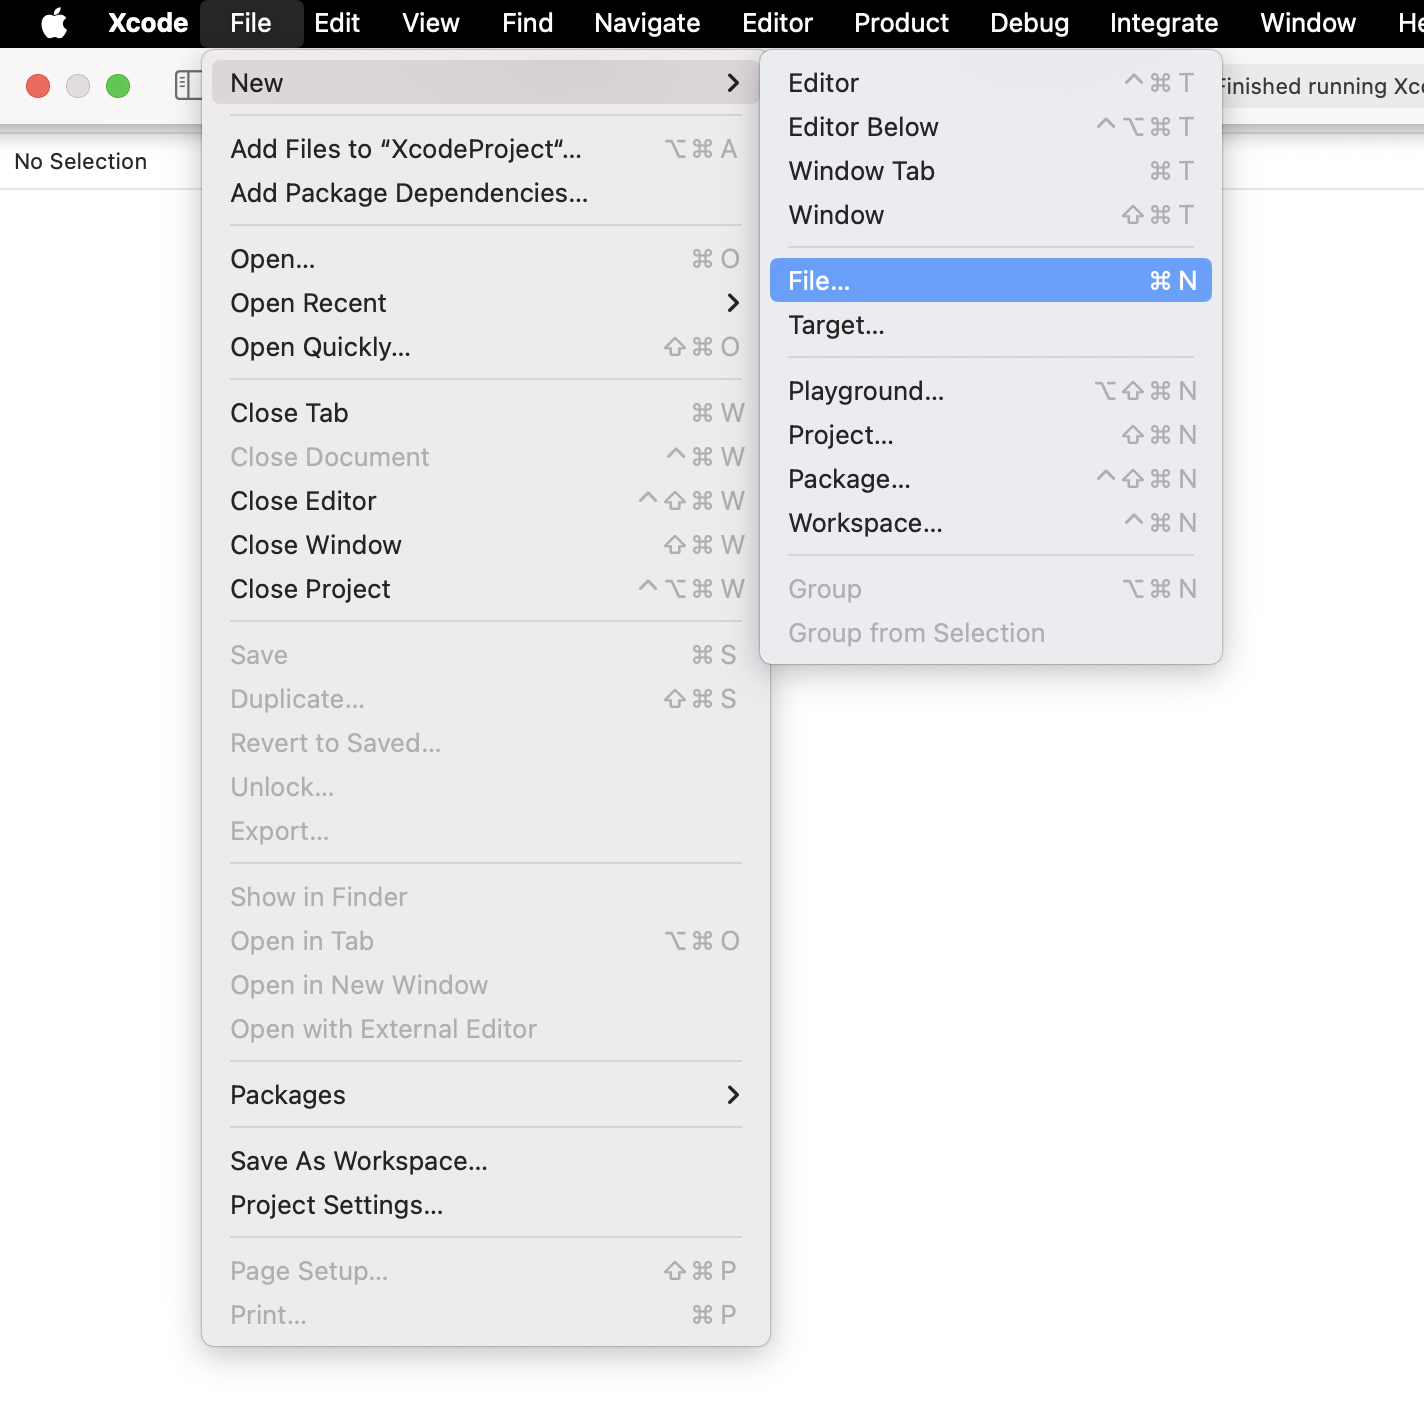
要新增一個假的推播通知 apns 檔案,可以從上方的選單列點選「File」→「New」→「File...」。
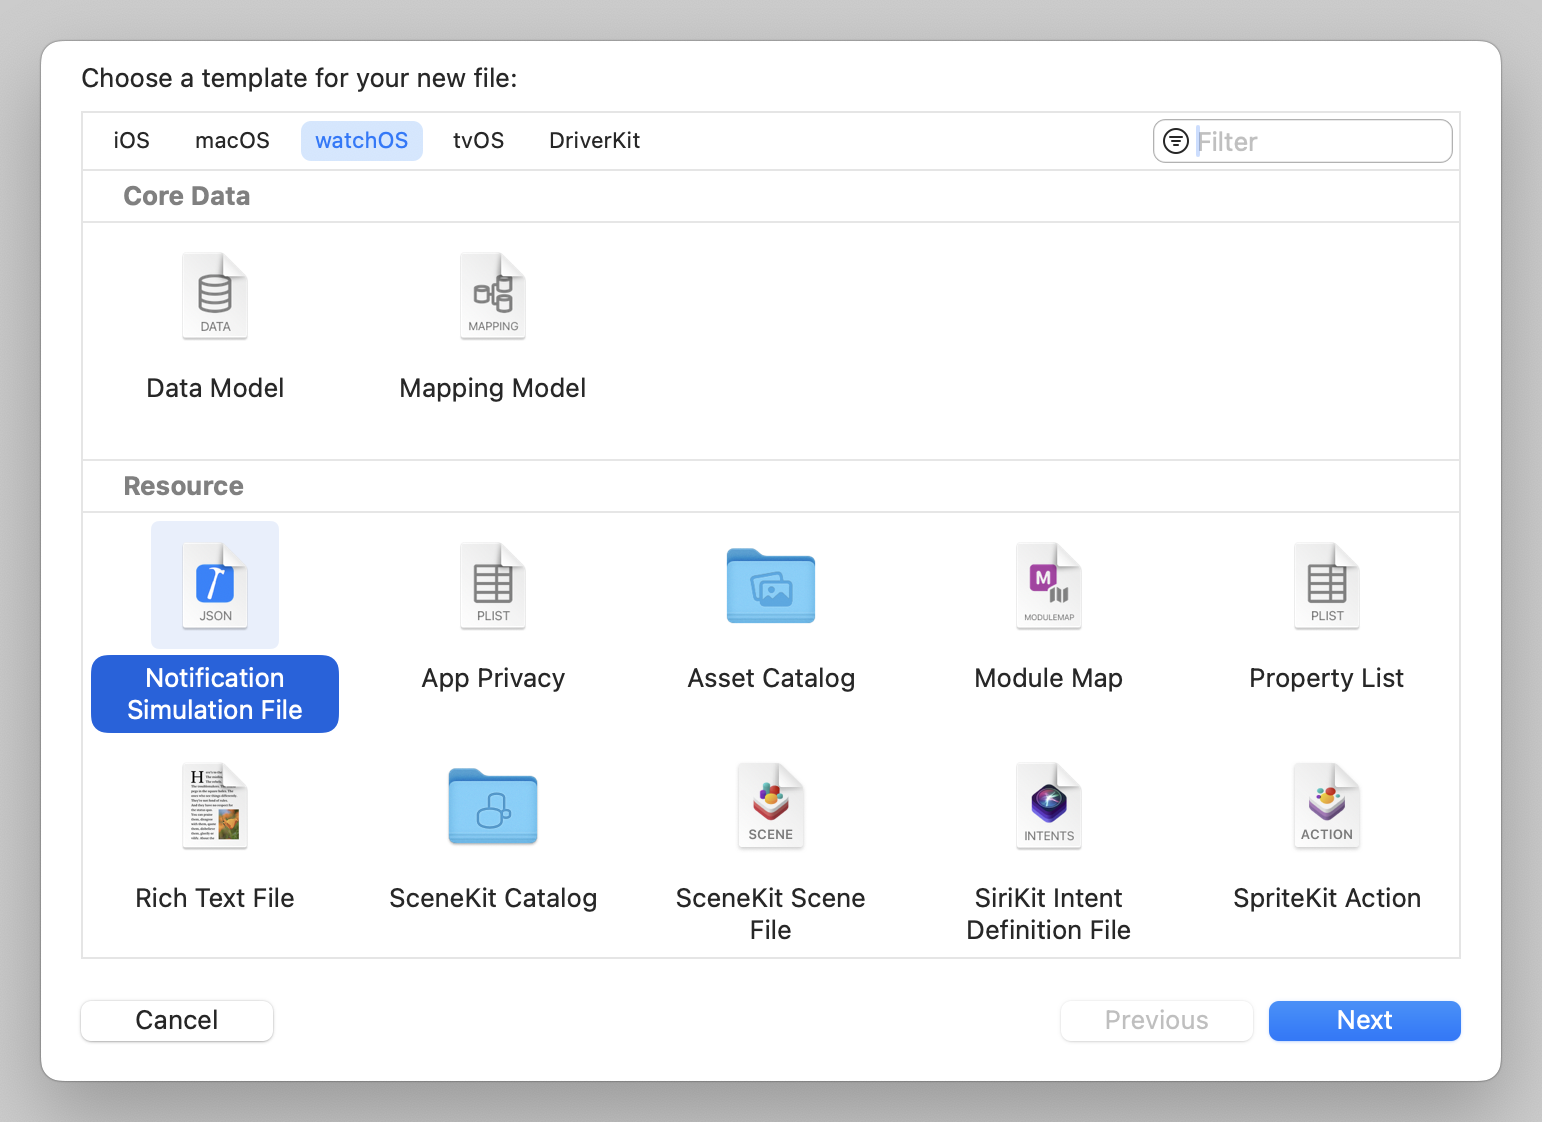
在 watchOS 下方的 Resource 分類裡,找到「Notification Simulation File」。
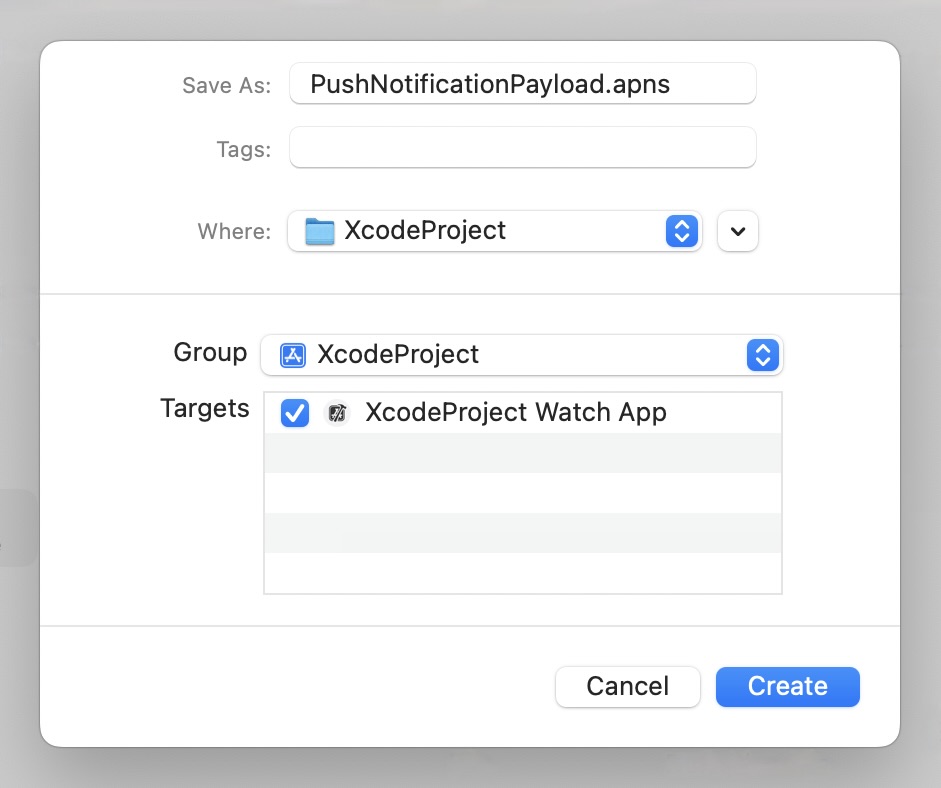
按下「Next」後,Xcode 會先幫我們取一個預設的名字「PushNotificationPayload.apns」,如果專案裡只有一個 apns 檔案的話,就可以不用修改名稱,但如果有多個的話,就要命別的名字,不然會有衝突。
建好模擬推播通知的 apns 檔案後,內容會像這樣:
{
    "aps": {
        "alert": {
            "body": "Test message",
            "title": "Optional title",
            "subtitle": "Optional subtitle"
        },
        "category": "myCategory",
        "thread-id": "5280"
    },

    "WatchKit Simulator Actions": [
        {
            "title": "First Button",
            "identifier": "firstButtonAction"
        }
    ],

    "customKey": "Use this file to define a testing payload for your notifications. The aps dictionary specifies the category, alert text and title. The WatchKit Simulator Actions array can provide info for one or more action buttons in addition to the standard Dismiss button. Any other top level keys are custom payload. If you have multiple such JSON files in your project, you'll be able to select them when choosing to debug the notification interface of your Watch App."
}
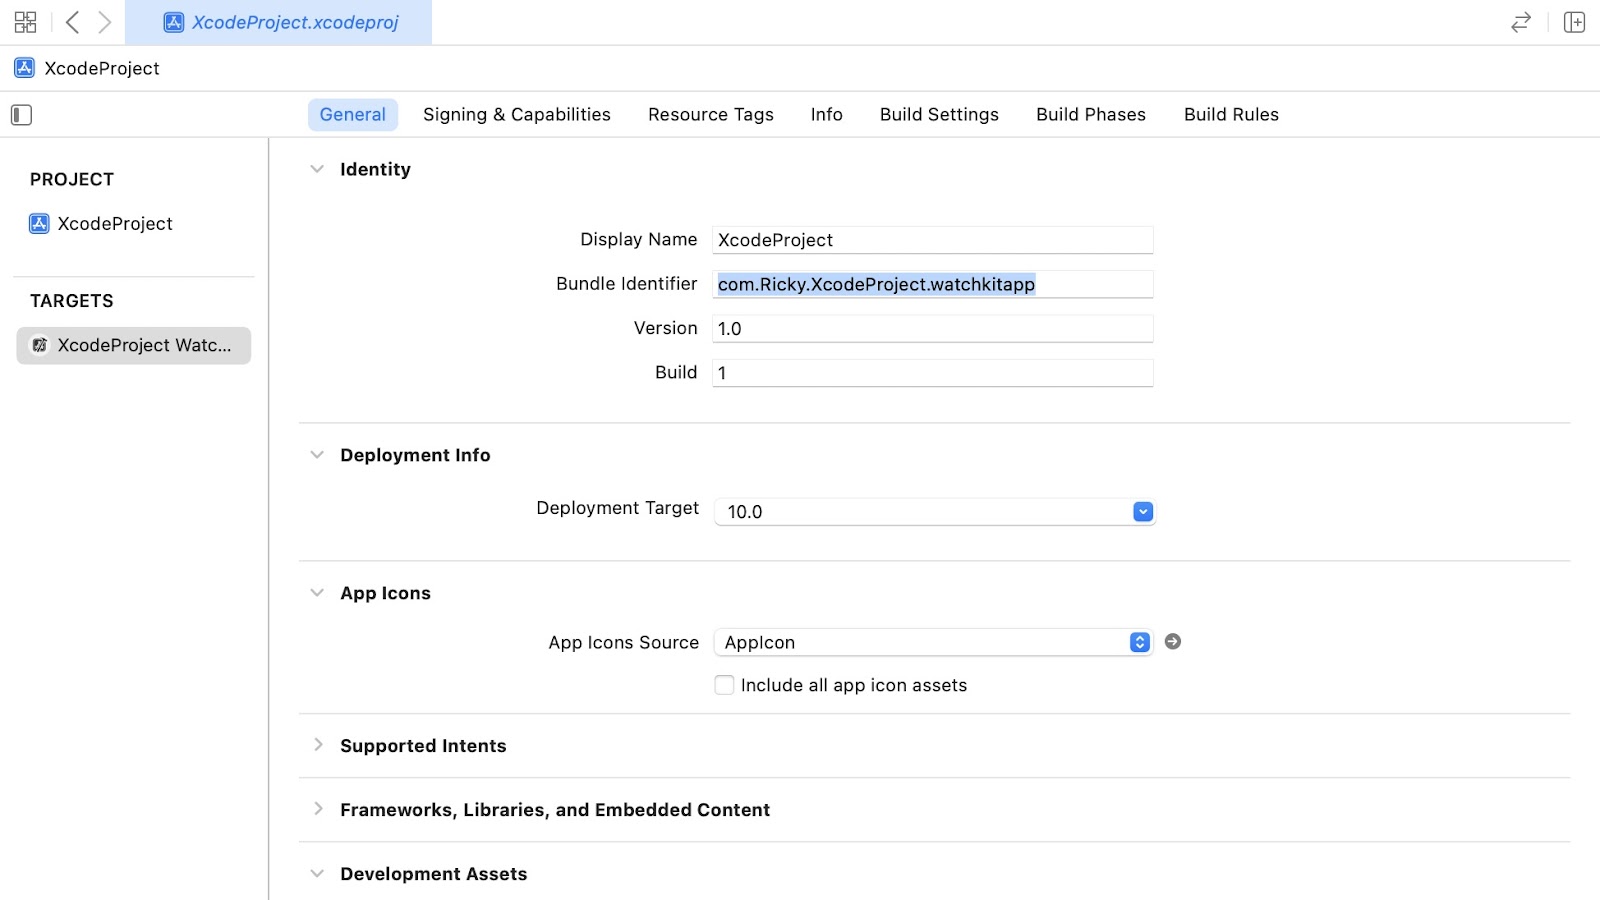
這裡我們還需要再加一個 key「Simulator Target Bundle」,等等才能順利的在模擬器上測試推播通知。
"Simulator Target Bundle": "com.Ricky.XcodeProject.watchkitapp"Simulator Target Bundle 的值就填在 Porject 檔中 General 裡的 Bundle Indentifier。
在 Xcode 新增一個測試推播用的 Scheme
要新增一個新的 Scheme 可以在 Xcode 上方的 Toolbar 點選正在執行的 Scheme,並選擇「New Scheme...」。
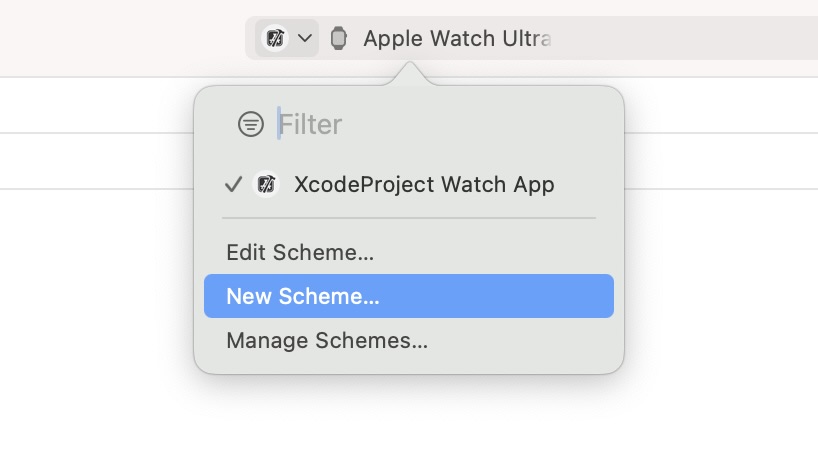
而如果是從上方的選單列的話,可以點選「Product」→「Scheme」→「New Scheme...」。
接下來就是幫 Scheme 取名了,因為我們是要測試推播通知,所以可以取為「Dynamic Notification」。

按下「OK」就完成了新增 Scheme,Xcode 也會自動幫我們選擇剛新增好的 Scheme,接下來就是調整 Scheme 的設定了。
設定用來測試推播的 Scheme
從 Xcode 上方的 Toolbar 可以選擇「Edit Scheme...」來編輯設定。
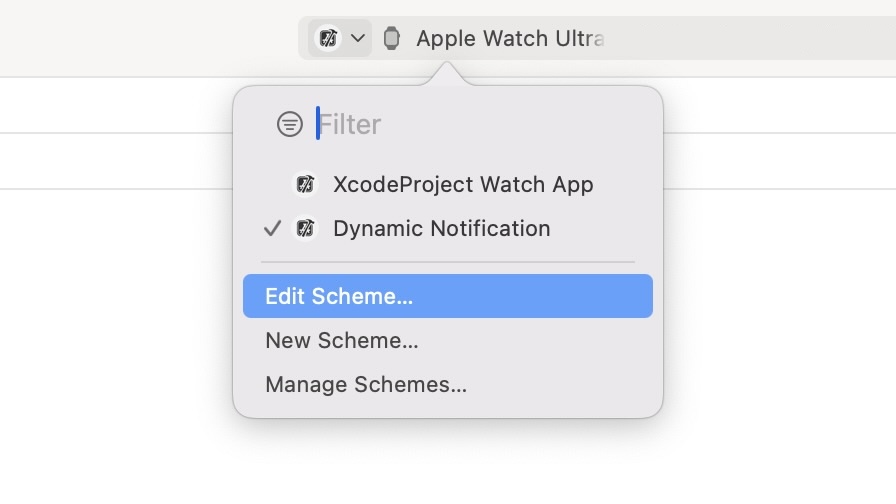
而如果是從上方的選單列的話,可以點選「Product」→「Scheme」→「Edit Scheme...」。
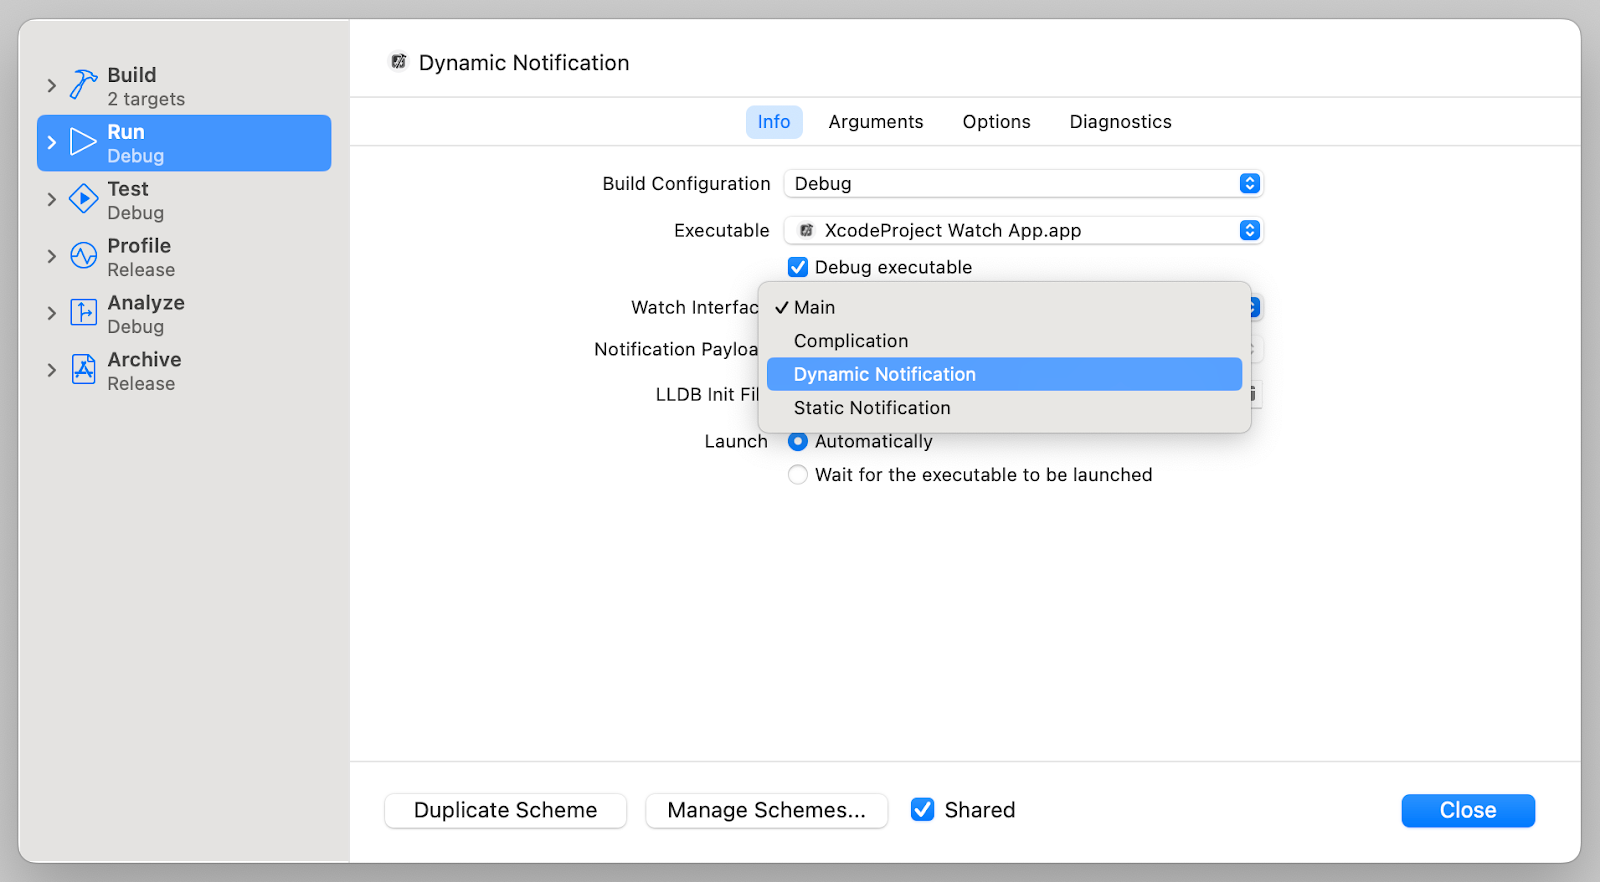
這裡,在 Run 的 Info 裡,我們要將 Watch Interface 從 Main 改成 Dynamic Notification。改完後,下方的 Notification Payload 欄位就會自動選擇我們剛剛新增的推播通知假資料。同時也會發現,Xcode 幫我們把這個 Scheme 的 Icon 換成了紅底鈴鐺。

在 Apple Watch 模擬器上測試推播通知
我們可以執行 App 並開始測試推播通知了!因為我們 Scheme 的 Watch Interface 改成了 Dynamic Notification,所以執行起來不會開啟 watchOS App 是正常的。而要測試推播通知最簡單的方法就是直接將我們剛剛新增的 apns 假資料檔案拖曳到 Apple Watch 模擬器上,推播通知就會自己跳出來了。
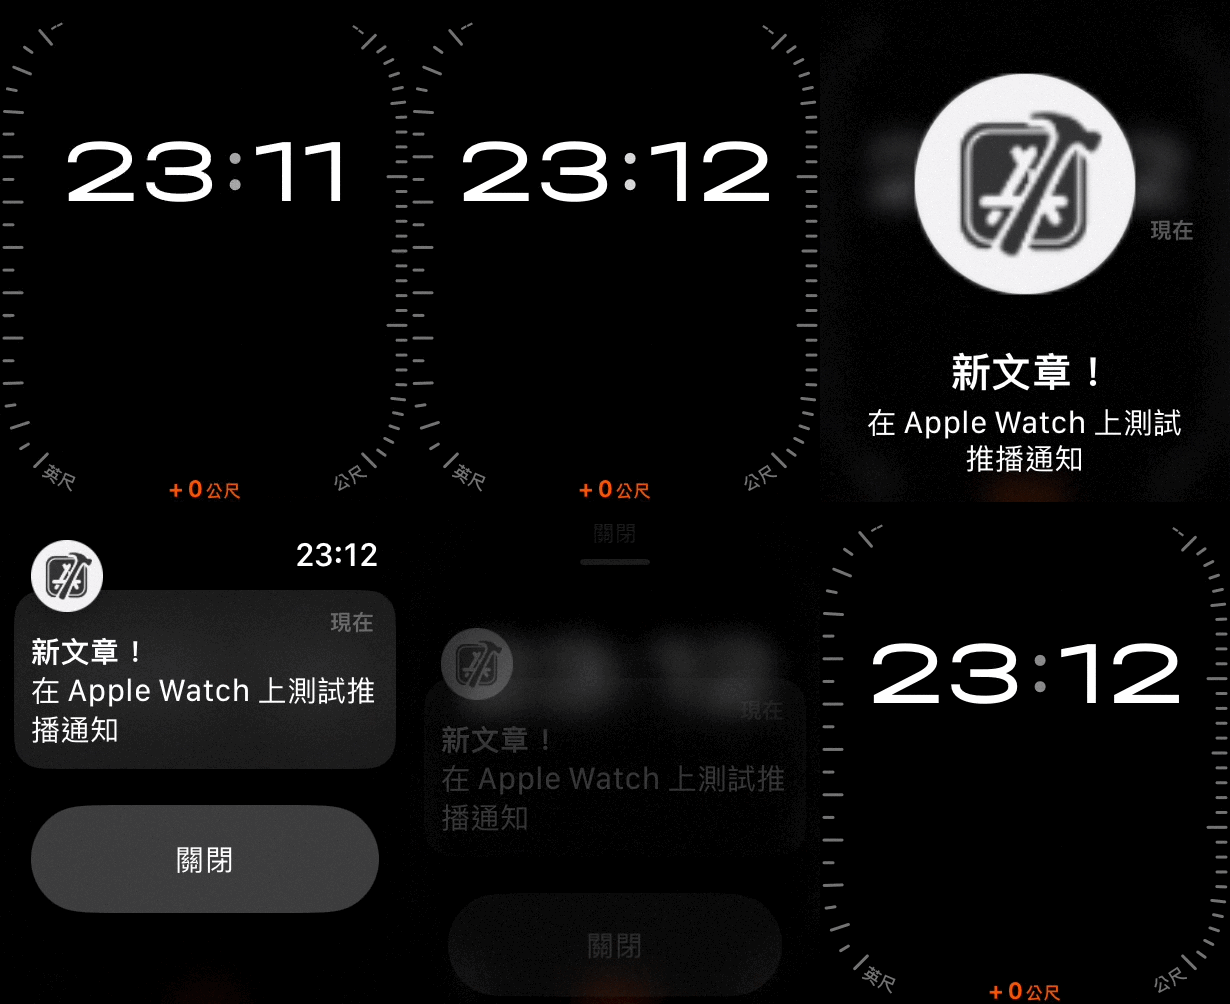
而如果想用終端機 Terminal 來觸發推播通知的話,指令如下:
xcrun simctl push [模擬機 Identifier] [App Bundle ID] [apns 檔案路徑]備註
想了解如何查看模擬機的 Identifier,可以點擊這裡,我們有另外一篇文章做詳細的說明。
關於 XcodeProject
XcodeProject 創立於 2023,致力於協助開發者探索 Apple 的創新世界,學習在 iOS、iPadOS、macOS、tvOS、visionOS 與 watchOS 上開發 App,發現眾多技術與框架,讓開發者獲得更多能力。